|
So with all the pictures and descriptions, you might be asking, "What's the objective?" Here are views of the project; from the street, from a drone, and from the trees in the back yard. The street view shows our new front porch extending out to the parking area. 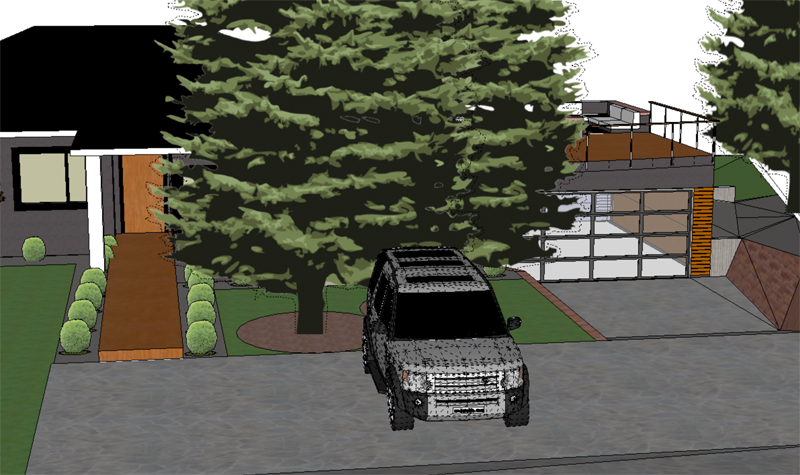
The drone view shows the integrated arcs of the house deck and the garage deck. It's rather simple to make, but this little addition in design makes a world of difference in appearance, do you agree? 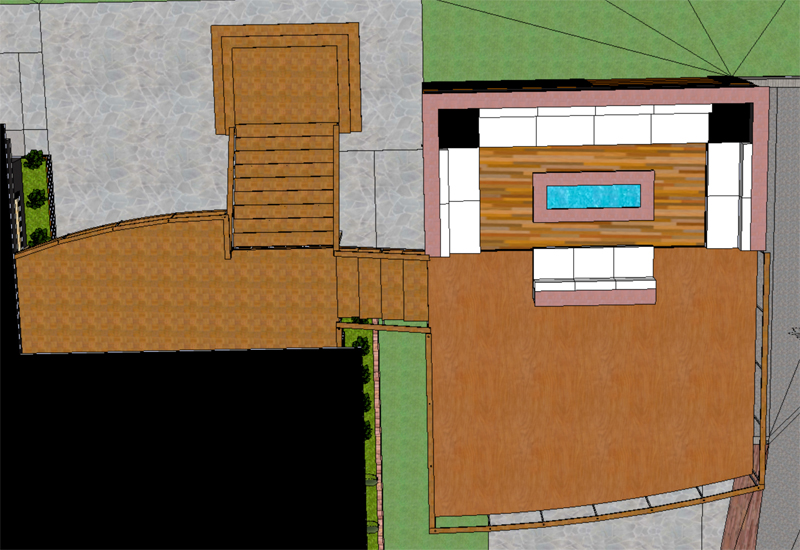
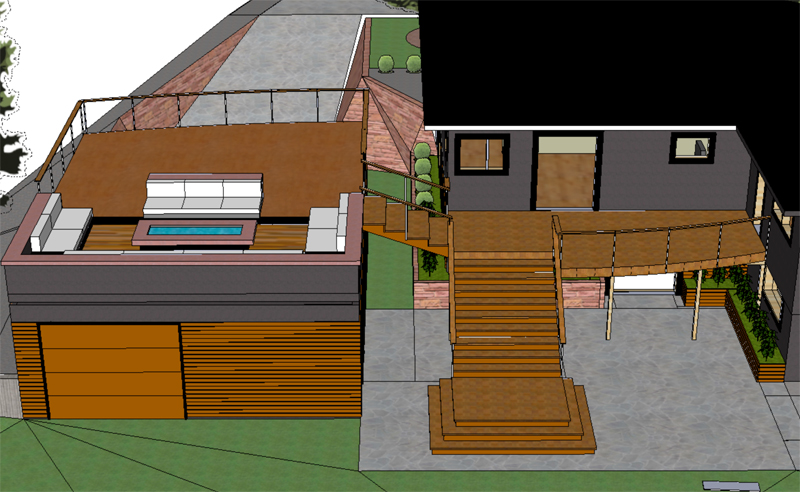
This final view shows how the deck on the house will access the garage roof top deck and also come down to the back yard. Those back yard stairs will be access to and from the garage - hopefully not too big a schlep for groceries,etc.
You may have noticed the built in seating area on the garage deck. Just keep in mind that how the plans look in a fancy animated simulation may not always be the reality in the final real world execution. But we're diggin' it and doing our best to make it happen - if it could just stop raining! I hope these set of pictures help clarify those in the very first blog post.
1 Comment
While we wait for last night's rain to evaporate (deja vu all over again) I can show you the smaller deck frame. At the end nearest the garage, the frame is square and ready for the stairs, yet to come. 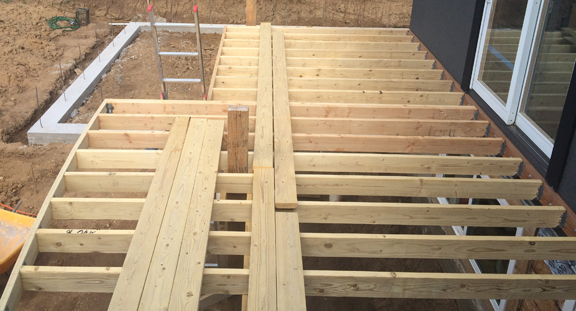
The other end of this little deck has an arc, returning the cantilever back to the main rectangular dimension of 8 feet. Here are a few shots; one from above, another from below, and a third with a detail of the saw kerfs made to bend the 2X6. 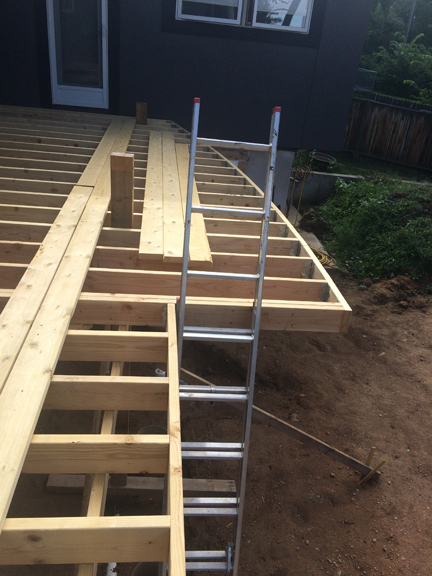
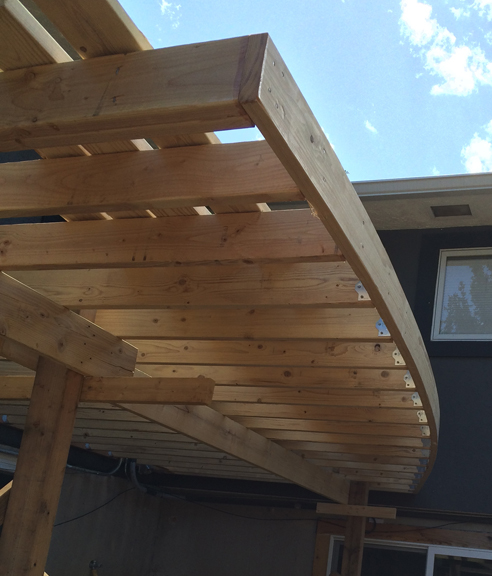
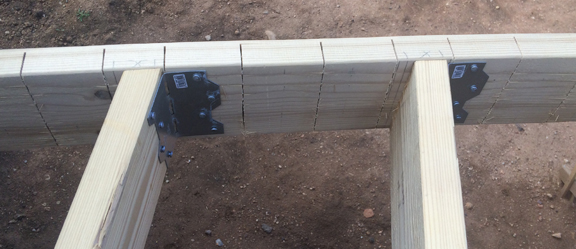
I cut each joist at the correct angle to meet the curved, rim board. Laid out with a full sized piece of flexible trim and to show where the joists would meet the curve. Who says there's no joinery in decks? Two more tips for construction of a deck. First, for every board that's part of the frame, cut off both ends to remove cracks and splits. Then as soon as you make the cut (and make it a good cut by using your chop saw patiently - don't hurry or the cut will be coarse) apply 2 coats on each end with some cheap shellac from Home Depot. This will seal the ends of the boards against future moisture and rot. Why cut and shellac both ends? Because it's MY deck and replacing a joist is not a simple thing to do, and I learned this from Terry Raat when I had a job building decks that came with a 20 year warranty. It's time well spent. It also adds to the Zen of woodworking. 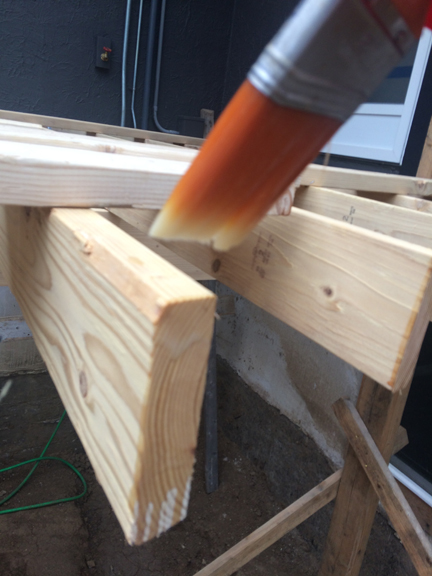
The second tip is to screw a board to the underside of the framing at each end when you have it exactly square. Otherwise, by the time you screw the decking down to the frame and start pushing or pulling the warped boards straight, you will discover your precious deck is no longer square. 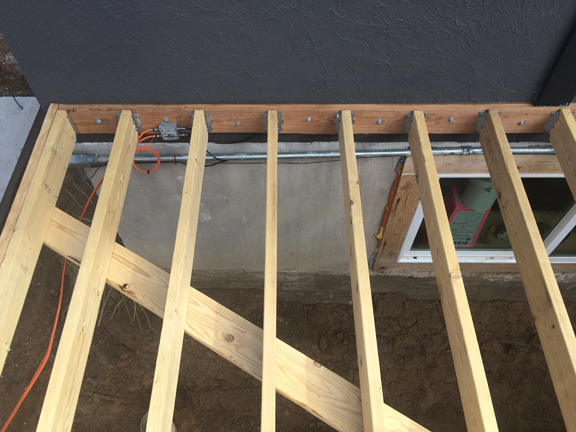
It may look OK, but the old deck was scary to walk on and I was always waiting for the time when we could replace it. Looking carefully, I think you can notice the bend in the middle where it sagged. At least the tourists didn't care. 
One of the benefits of replacing the deck was to allow for access to remove the dirt and gain a walkout basement. Here's a pic of the 'window well' I dug to gain access to the sliding glass door installed during the basement remodel. 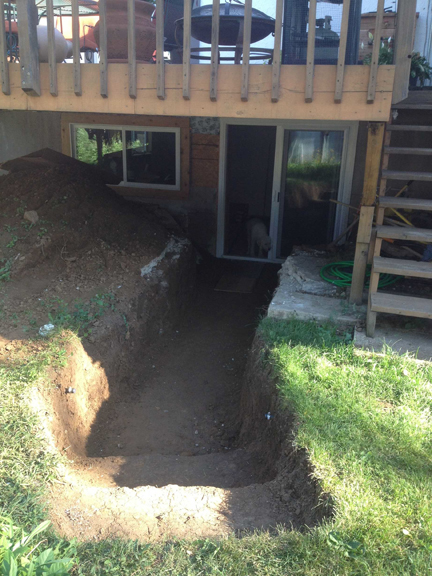
Literally, removing the old deck took only a few hours. Looks good, but so much has happened since then. 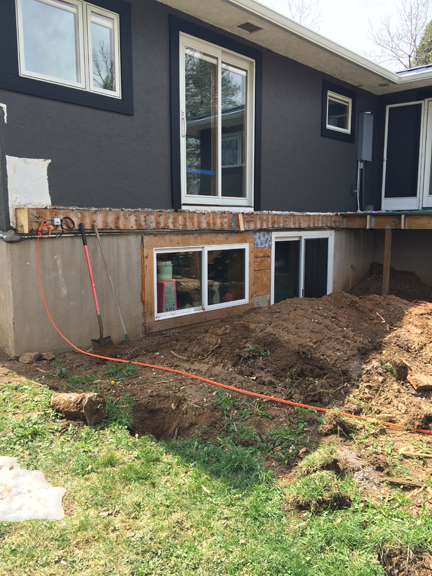
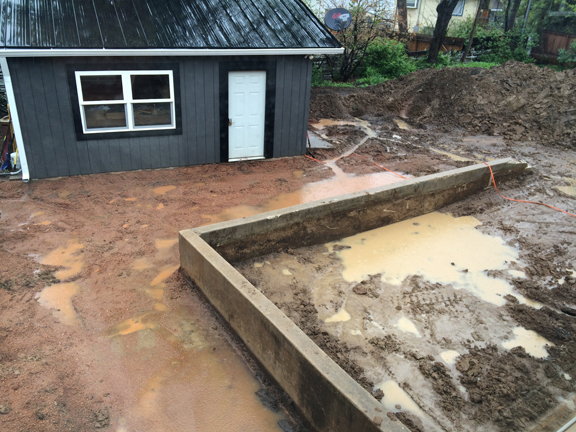
The concrete truck is here! (Maybe not for you, but this is really exciting!) It arrived last Tuesday. Lots of prep to remove the accumulated mud washed into the footer from the heavy rain the night before. Then, the work began transporting concrete to the farthest areas by wheelbarrow. Managing the rebar in its proper position was easy once the concrete filled the forms because it helped stabilize the rebar. This is a front pouring truck, not the traditional style we're used to seeing. 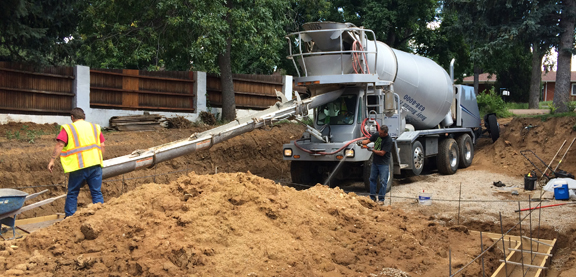
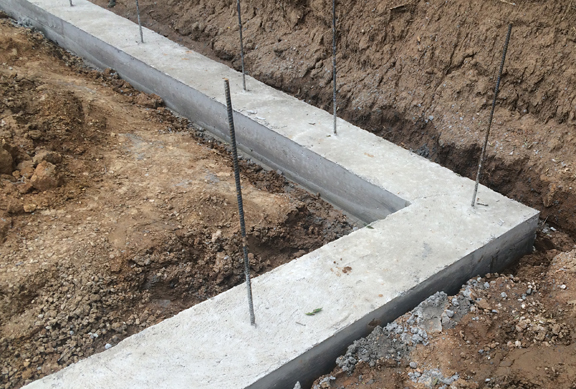
About three hours later the concrete is distributed evenly, to the top of the forms - which have been installed perfectly level. Then it's finished smooth on the top. Here are a couple of shots of the footer after the forms have been removed. 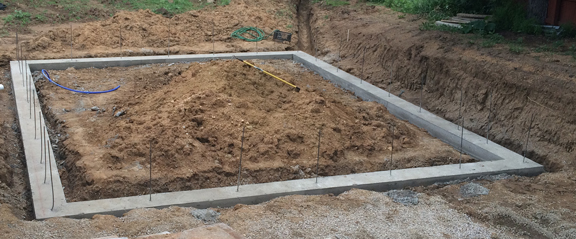
The foundation walls should be up sometime next week.
After that we'll backfill both the inside and outside to prepare for the garage floor, driveway, and final grading of the rest of the yard. Finally! Building things other than pipes below ground gives us the feeling we're getting somewhere. The most important step in building a deck is the ledger board - the first board. The ledger is bolted to the house and must be absolutely level and straight. Pick the best board you can find! Every bolt hole is predrilled and each joist location is marked before the ledger is installed. Once the ledger is up, only one side of every joist hanger is nailed using a 6 inch long joist scrap as a guide. You can't see this from the street, but isn't it pretty? 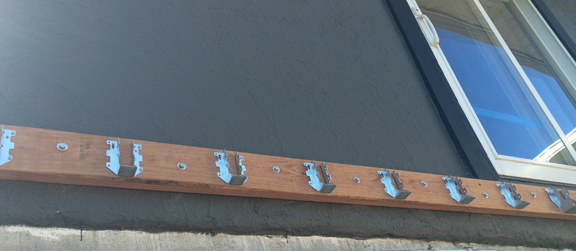
Now I need to create a temporary structure to hold everything in place and allow access. 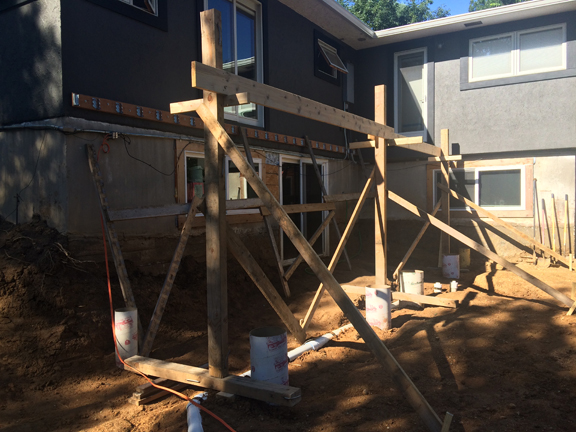
Now there's momentum! Because the joist hangers have been located and the temp frame is level, I literally connect only one end of the joist to the hanger and let the other end rest on the temp frame. The ends will be cut to length and receive the rim joist. The temp frame will come down after the beam and posts have been attached and the concrete is poured in the tubes. 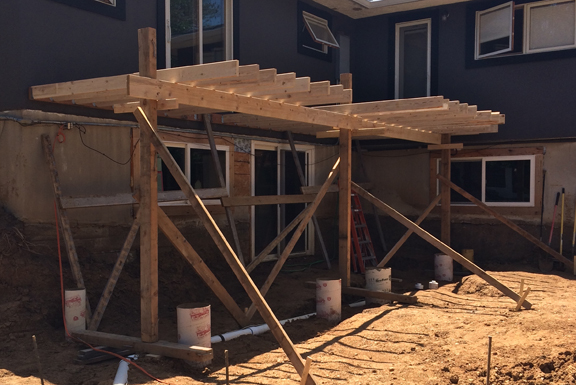
Excellent progress being made. The same day the temp frame was constructed, the forms for the footer were set. 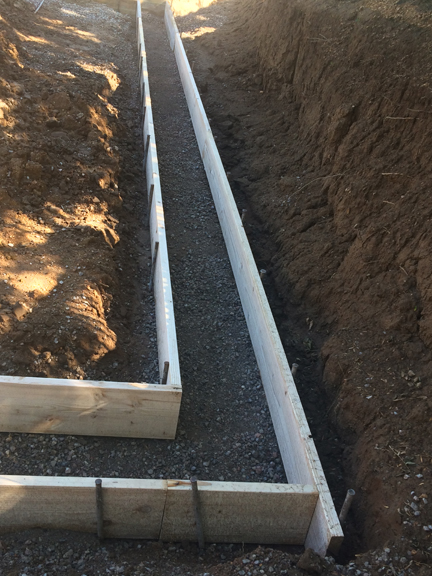
The next day, while I put up some of the joists, Chuck finished the footer by adding the rebar. Chuck is brilliant and patient. 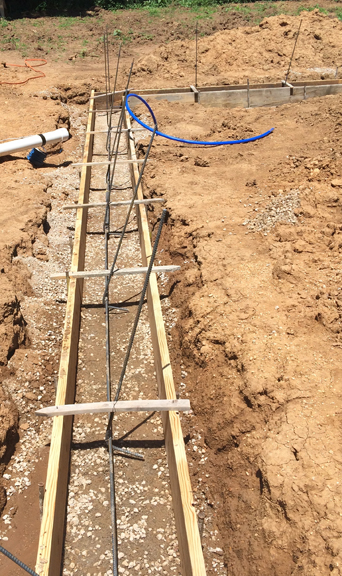
All finished last Saturday, the footer inspection was yesterday and passed without a hitch.
OF COURSE IT RAINED LAST NIGHT AND WE GOT 2 INCHES IN 20 MINUTES!! Peacefully, concrete is being delivered today. Sweet. Last Thursday, I took a day off with a different set of tools. Didn't teach golf to my son, but gave a little driving advice - not the club, the cart! 
Different day off, different smiles. The Renaissance Fair was surprisingly way cool! I should say there were genuine smiles, but this is the best photo to be had... 
Just for fun, here's how you know when you need a deck replaced. I could pull the framing apart with my hands, due to the excessive rot! 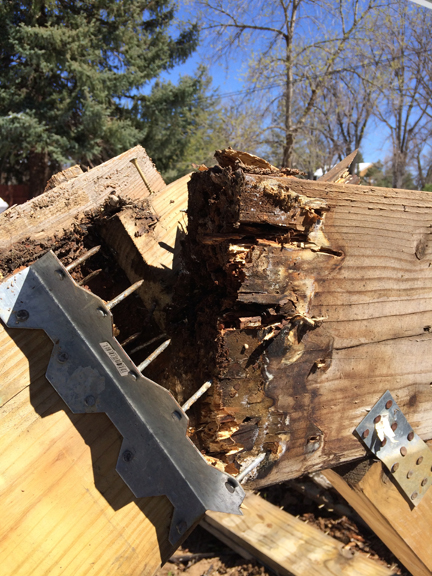
Since the beginning of May, when this project began, it's been Water World! Just yesterday, another torrential downpour filled up my latest excavating accomplishment. The footer was dug, level, and dry. Now we have a moat (we are not looking to adopt any alligators.) 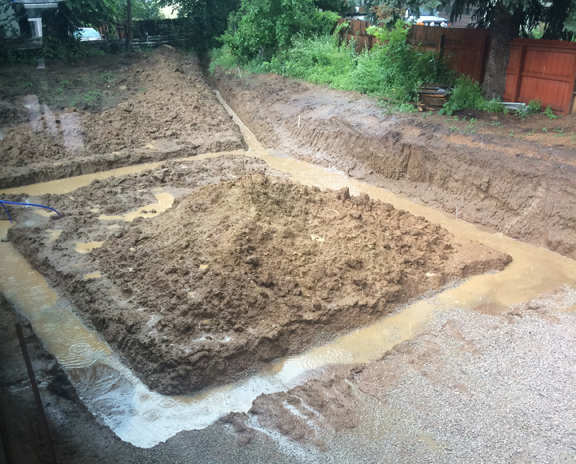
Here's a picture that shows the juxtaposition of modern plumbing and original Roman Aqueduct version. 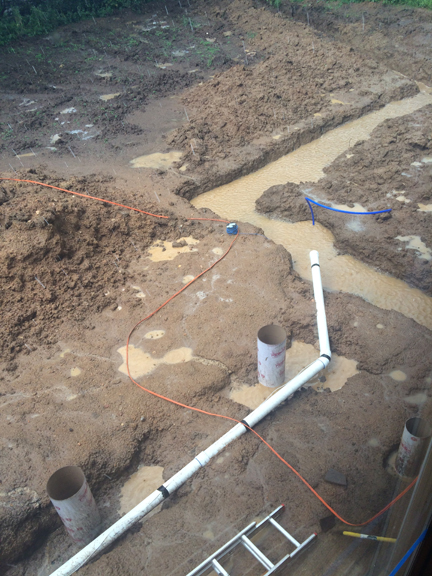
Just for fun (fun for me, I don't know how fun this is for you) here's a picture of the original septic tank, circa 1950. Notice it's brick! Probably 15 feet deep and about 8-10 feet in diameter. I have long since filled it up with fill dirt, saving a few truck loads in the process. 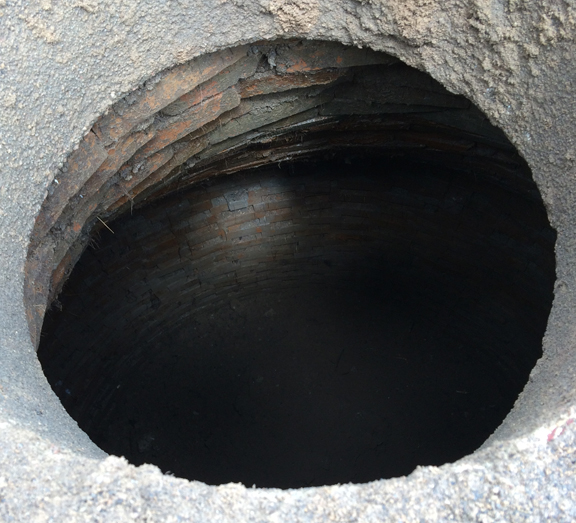
This photo, although older, shows the most lovely version of the impact of runoff. My only regret is that a neighbor who was walking by said there were ducks swimming here, but I was not able to capture that moment. 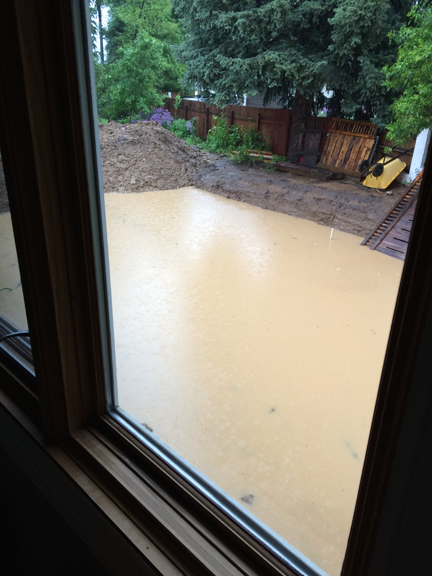
Just wrapping up for sake of beating a dead horse, here's more from the beginning. There's still lots of dirt in this shot that has yet to be moved. 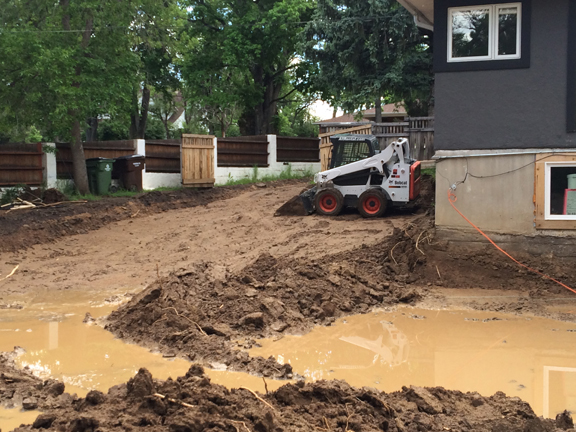
The thing about any project is there's a beginning and an end. Many tasks need preparation, so there's a natural order to everything. I mean, you can't build the deck on top of the garage until the garage is built. The garage can't be built without a foundation. The foundation can't be laid until the water and waste water lines have been dug, assembled, and most importantly - inspected. After finally grading the lot mostly flat and then moving the mountain, there's a moment of serenity... But, you dig trenches like a fury of destruction to an otherwise peaceful scene. Trenches to replace the overhead power lines, for the internet, and for clean water in and grey water out. I think 'trench' should be a four letter word in modern English. Just getting the correct information can be Rocket Science. The Regional Building Department will tell you "bury your water line 60 inches deep" and they mark your plans accordingly. Call for the inspection and the Inspector says, "We don't inspect outside lines, you need to call the Utility company." Then the Utility Company tells you "bury your water line 72 inches deep." REALLY? I just dug a 12 inch wide 60 inch deep trench, and now I'm supposed to dig it 12 inches deeper? I don't even fit in the trench. Digging an extra 12 inches deep with the excavator would have taken 15 more minutes, tops. How deep do you have to go before the frostline (30") is safely observed? I make a stand and won't dig deeper. Fortunately, there's a difference between being a contractor and a homeowner. I win - with much pleading and bended knee time. Look at the maze! 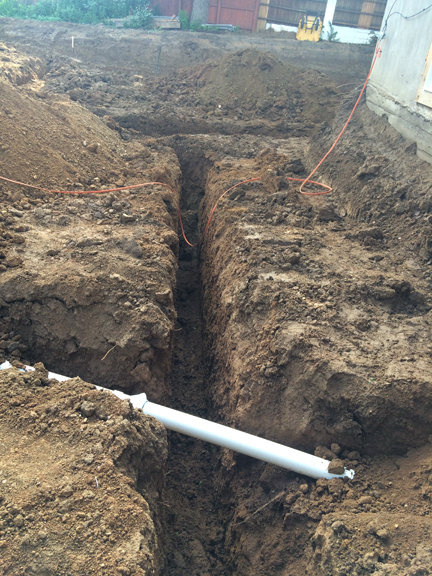 Then there's the fresh water lines (blue pipe) and waste lines (big white pipe.) Something new for me; both lines need tracer wires for future location and identification.  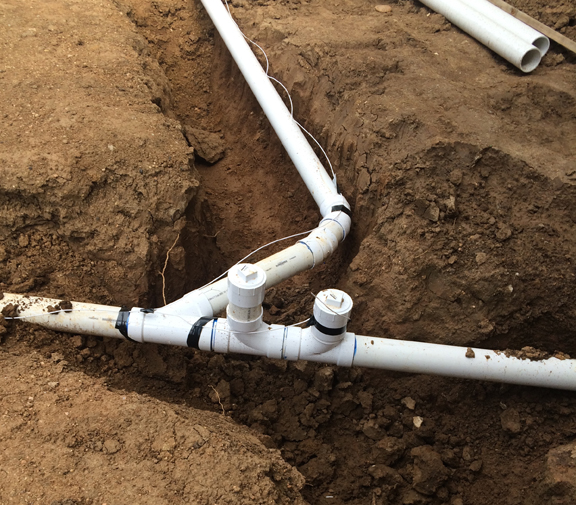 Fortunately, I have company. My son, Dane, is making some hourly cash (though not as reliable as a rental diesel product) and helping when possible. He's doing great, as the more he works the better he performs. Love that guy! 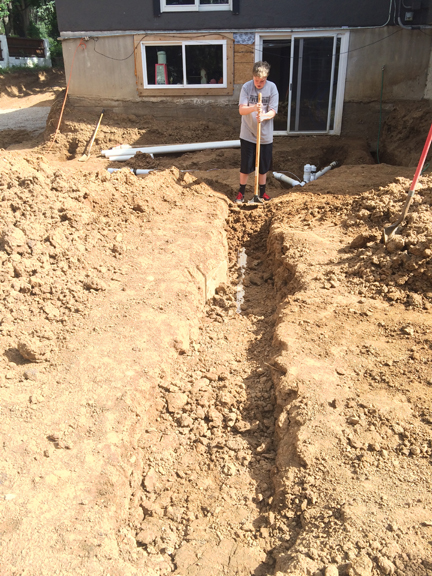  Cheers!
Lots of work being done and it's exhausting. I could use a day off. The good news is there was an SCCA (Sports Car Club of America) Autocross at PPIR (Pikes Peak International Raceway). An Autocross is making your way around a parking lot course defined by pylons. Compete against similar cars with 4 runs, each only lasts about a minute, and best time wins. Hit a pylon and you get a 2 second penalty. At best, you'll get up to 50mph. It's more fun than it sounds, and for a car geek like me it's pretty much the best thing ever! I used to Autocross all the time, back in the day. Now that my daughter Quinn is driving I wanted to take her to see one of these for herself. (BTW, the third date Diane and I ever had was an autocross - I knew she was the one!) Quinn and I spent the day together at PPIR. She preferred to watch Dad drive, but was a passenger for 3 out of my 4 runs. We had a wonderful day, despite the 90 degree temperature. Used Quinn's car as the Expedition or Land Rover don't Autocross very well and there's no class for SUV's. Back to work today... 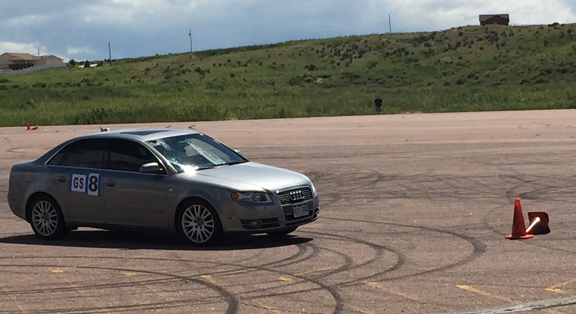 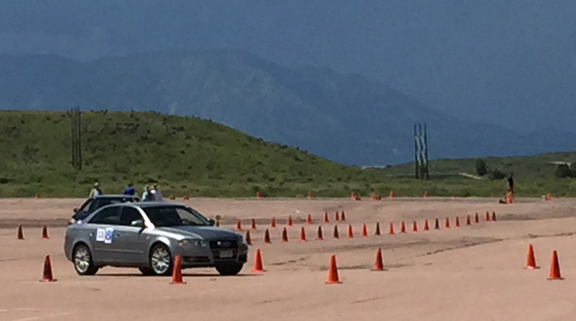  At the height of our artistic piles, intended pun, we eventually moved 52 dump truck loads of dirt - technically clay, but a pile of dirt. Yes, 52 loads in one weekend! (I have very kind and tolerant neighbors, thank you very much.) Here is the picture of the pile before it was removed, and another with the biggest rental tool I've ever had. My only concern was "Don't hit the house!" 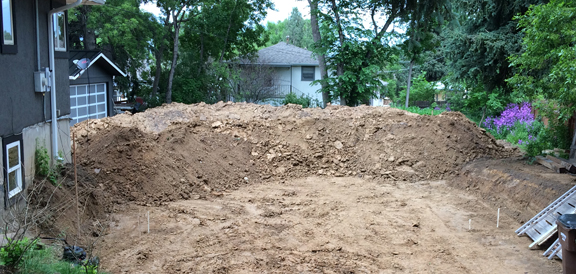 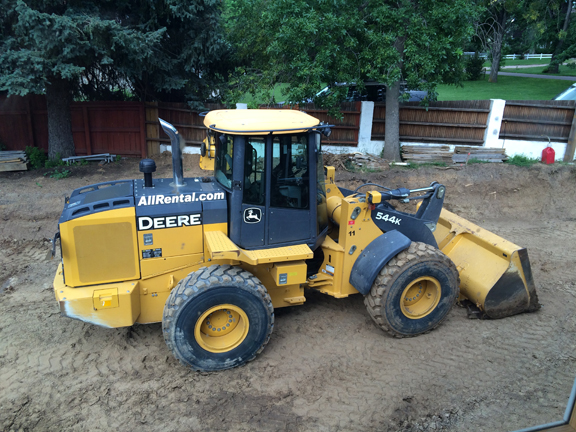 It was very difficult to schedule the truckers when they have had an equally hard year with the rains affecting their normal routine. So the 52 load weekend began early one Sunday morning with 4 trucks coming and going in 15 minute intervals. Amazingly, everything was better than I imagined. Our lot was clear, mostly flat, and ready for the next phase. Another rental and this one digs ditches. Do I have a lot of ditches to dig! 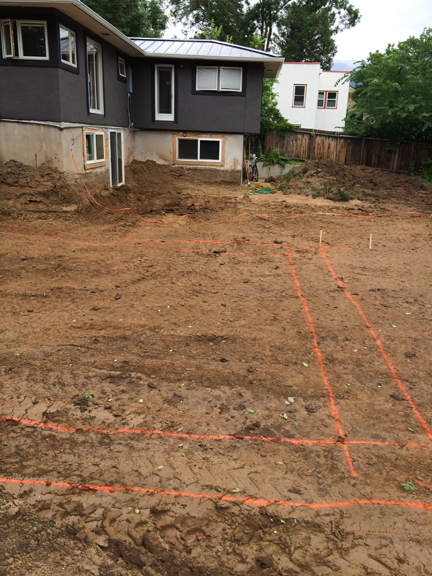 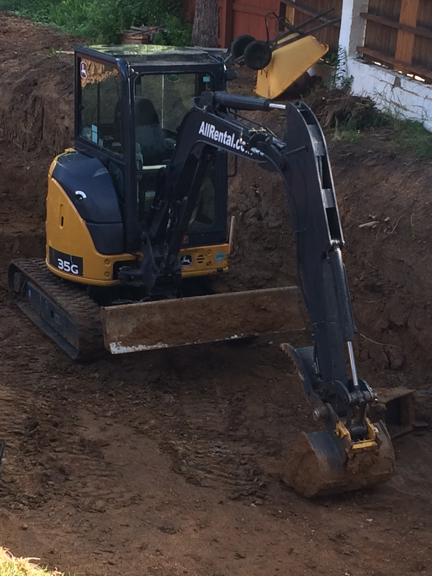 The first thing on the massive to do list was removing the aging and obstructive hedge of Lilacs. Cut down in a day and trash bagged the next. Suddenly the back yard was 40 feet deeper, from where the hedge was to the back fence - visible for the first time. It's a nice reminder to look at the picture and see grass. 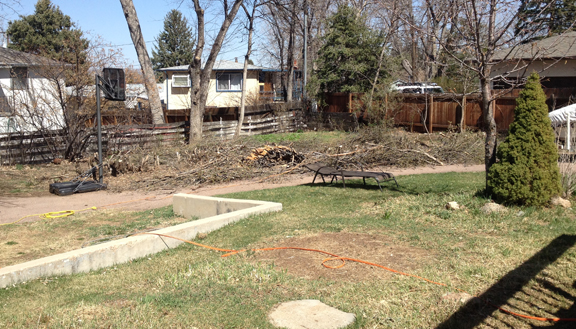 Aside from bags at the street on trash day, we created our first artistic pile of debris. Asphalt! 'DIY' means rental of all things diesel powered, and at the top of the list is a brilliant invention called "Bobcat." Five dump truck loads were needed to move about 3,000 square feet of crumbling pavement. Here's a picture of the pile from our side. 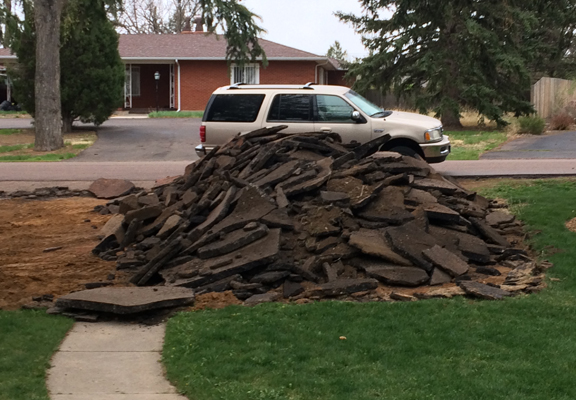  |
AuthorSix years ago this blog began when I began building a detached garage with a rooftop deck connected to our house deck. I did everything then, but now the blog will show some recent projects. Archives
August 2024
Categories |
 RSS Feed
Thomas J. Birkeness, Founder & Master Craftsman | 719.896.0574 | [email protected]