|
The decking has arrived! With the construction, it's quite a haul from the top of the driveway to around back - and this stuff is heavy (cement all over again!) These 6 inch wide boards range from 9 to 17 feet in length. We chose "ipe" for the deck. It's real wood. Not cheap, but better than the best artificial decking, I think, both in price and durability. The only drawback is it will need a fresh coat of Ipe Oil every couple of years, but just wait until you see it finished. Should be worth the effort. It is all stacked and stickered for the next 7 days to acclimate. Then it's time for installation with stainless steel screws. 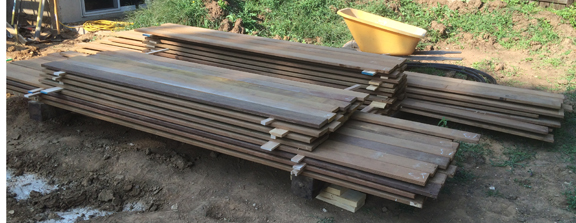
0 Comments
I don't mind the rain, or the rain, or the rain. What I really hate is an 80 pound bag of cement. No matter how good the job turns out, my back hates it. It was just under 20 bags, yes that's not even 1,600 total pounds. This ranks even lower than shoveling wet clay, on the "I can't wait for this job to be over," meter. Just add water, mix, and cement turns into concrete! 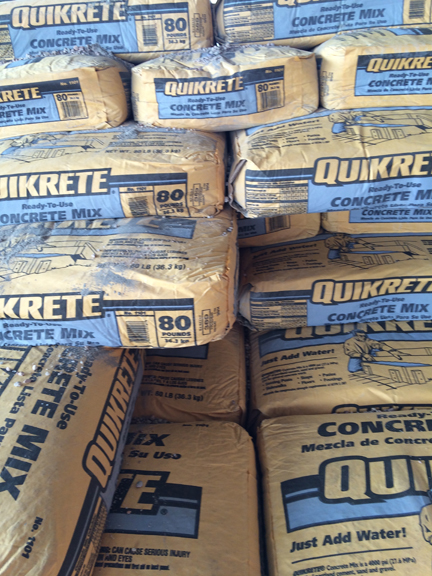
Here's what the concrete looks like in its finished form. A hole dug into the ground 30 inches deep with a 6 inch tall collar, sculpted to look fresh as a daisy. The form will come off and reveal pretty concrete 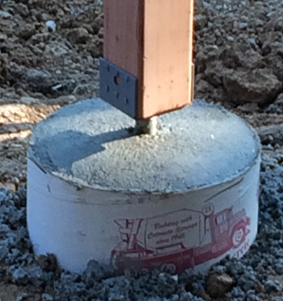
I'd rather shovel this pile of crushed concrete (how appropriate.) This pile was 15 tons and is actually easy to work with. 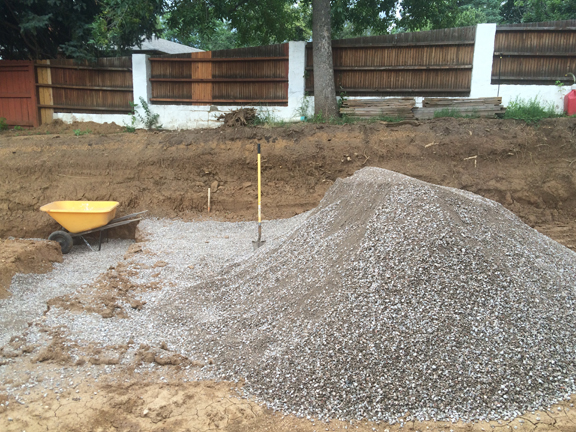
The foundation walls are being constructed right now. Once inspected, the walls are poured. After the walls, backfill on both sides, then the garage floor!
I can't wait... So with all the pictures and descriptions, you might be asking, "What's the objective?" Here are views of the project; from the street, from a drone, and from the trees in the back yard. The street view shows our new front porch extending out to the parking area. 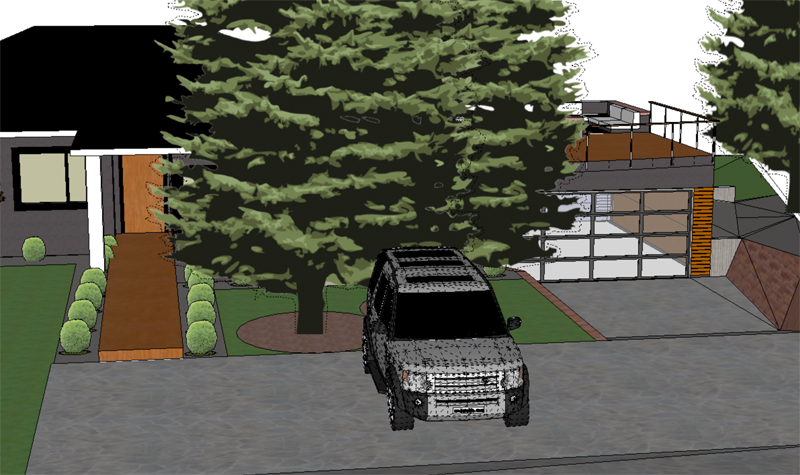
The drone view shows the integrated arcs of the house deck and the garage deck. It's rather simple to make, but this little addition in design makes a world of difference in appearance, do you agree? 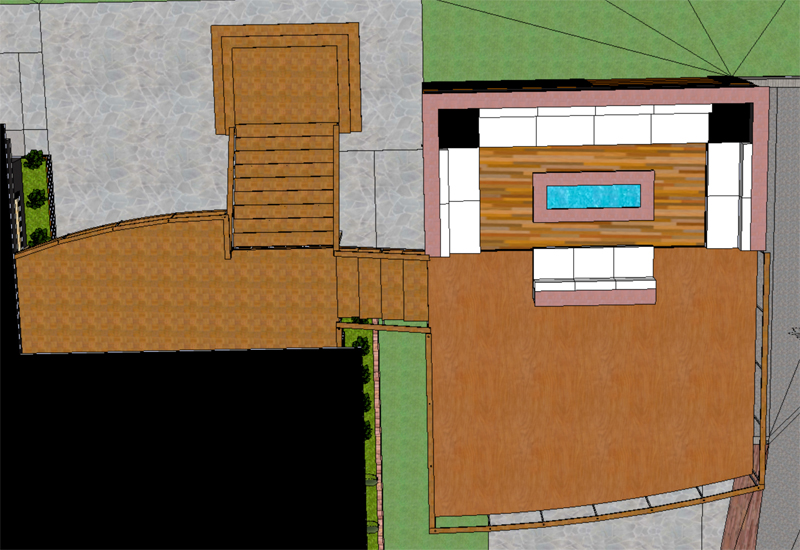
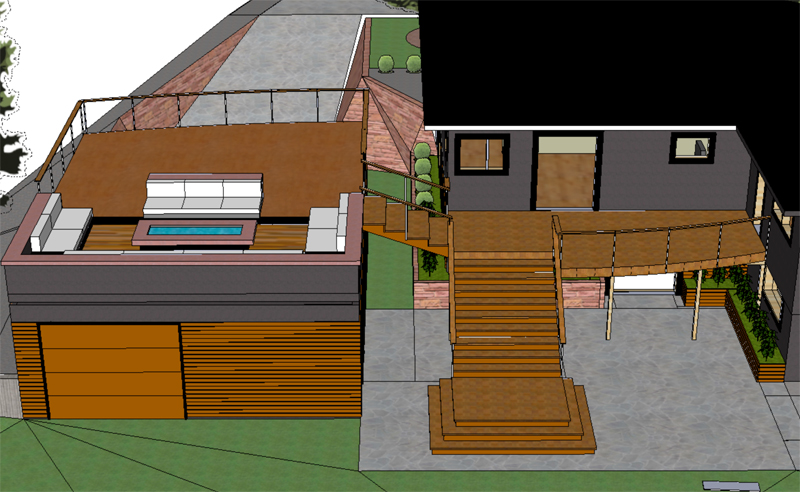
This final view shows how the deck on the house will access the garage roof top deck and also come down to the back yard. Those back yard stairs will be access to and from the garage - hopefully not too big a schlep for groceries,etc.
You may have noticed the built in seating area on the garage deck. Just keep in mind that how the plans look in a fancy animated simulation may not always be the reality in the final real world execution. But we're diggin' it and doing our best to make it happen - if it could just stop raining! I hope these set of pictures help clarify those in the very first blog post. While we wait for last night's rain to evaporate (deja vu all over again) I can show you the smaller deck frame. At the end nearest the garage, the frame is square and ready for the stairs, yet to come. 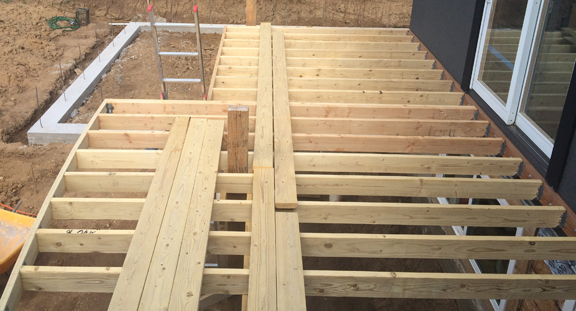
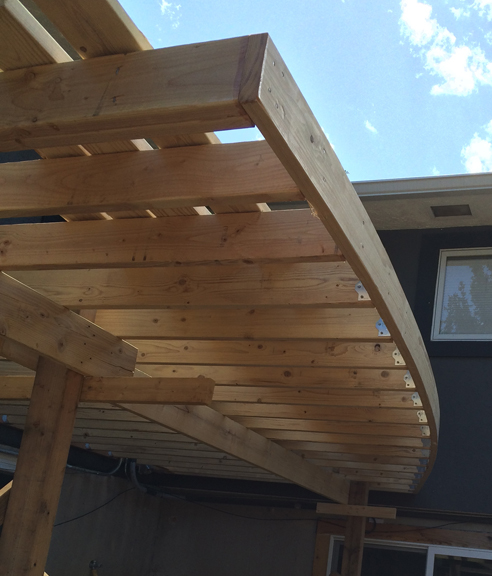
The other end of this little deck has an arc, returning the cantilever back to the main rectangular dimension of 8 feet. Here are a few shots; one from above, another from below, and a third with a detail of the saw kerfs made to bend the 2X6. 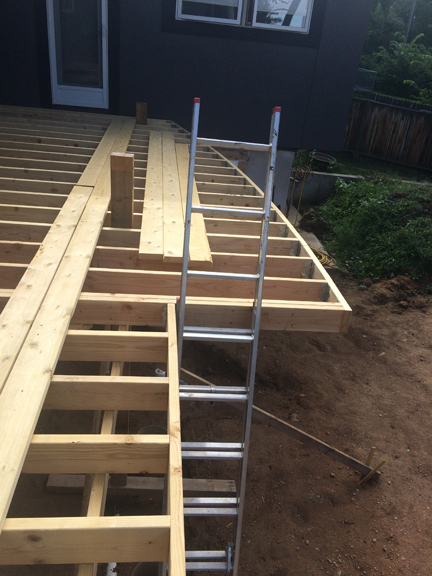
I cut each joist at the correct angle to meet the curved, rim board. Laid out with a full sized piece of flexible trim and to show where the joists would meet the curve. Who says there's no joinery in decks? Two more tips for construction of a deck. First, for every board that's part of the frame, cut off both ends to remove cracks and splits. Then as soon as you make the cut (and make it a good cut by using your chop saw patiently - don't hurry or the cut will be coarse) apply 2 coats on each end with some cheap shellac from Home Depot. This will seal the ends of the boards against future moisture and rot. Why cut and shellac both ends? Because it's MY deck and replacing a joist is not a simple thing to do, and I learned this from Terry Raat when I had a job building decks that came with a 20 year warranty. It's time well spent. It also adds to the Zen of woodworking. 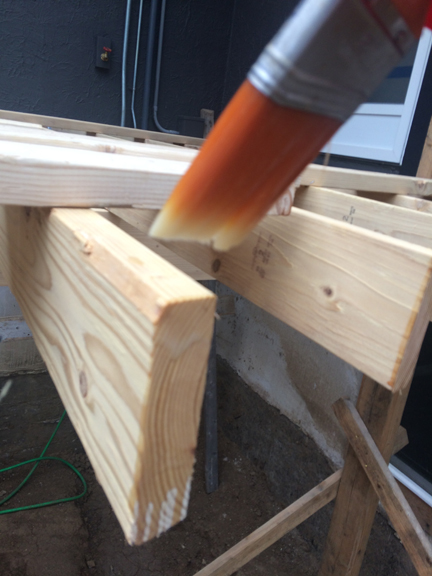
The second tip is to screw a board to the underside of the framing at each end when you have it exactly square. Otherwise, by the time you screw the decking down to the frame and start pushing or pulling the warped boards straight, you will discover your precious deck is no longer square. 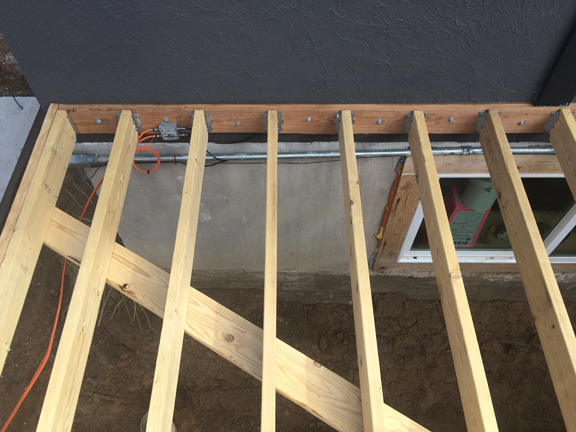
It may look OK, but the old deck was scary to walk on and I was always waiting for the time when we could replace it. Looking carefully, I think you can notice the bend in the middle where it sagged. At least the tourists didn't care. 
One of the benefits of replacing the deck was to allow for access to remove the dirt and gain a walkout basement. Here's a pic of the 'window well' I dug to gain access to the sliding glass door installed during the basement remodel. 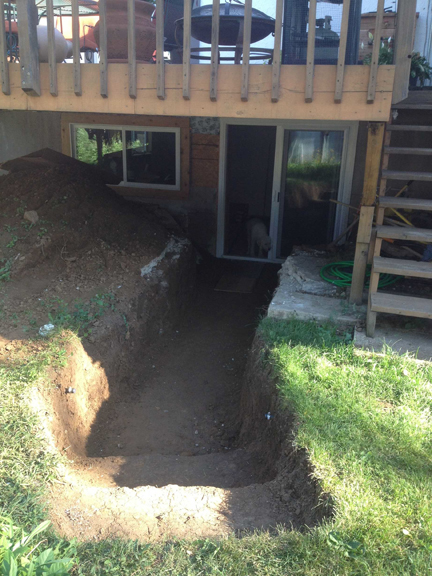
Literally, removing the old deck took only a few hours. Looks good, but so much has happened since then. 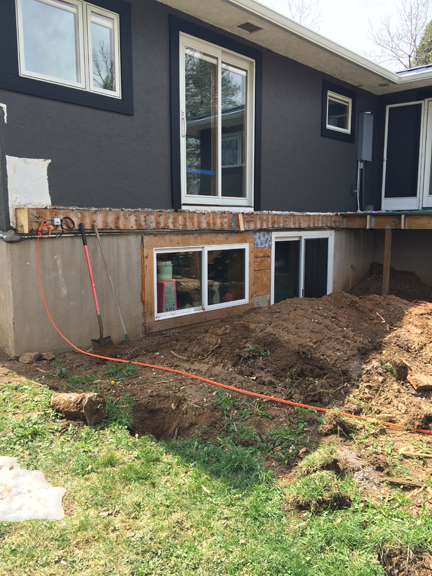
The concrete truck is here! (Maybe not for you, but this is really exciting!) It arrived last Tuesday. Lots of prep to remove the accumulated mud washed into the footer from the heavy rain the night before. Then, the work began transporting concrete to the farthest areas by wheelbarrow. Managing the rebar in its proper position was easy once the concrete filled the forms because it helped stabilize the rebar. This is a front pouring truck, not the traditional style we're used to seeing. 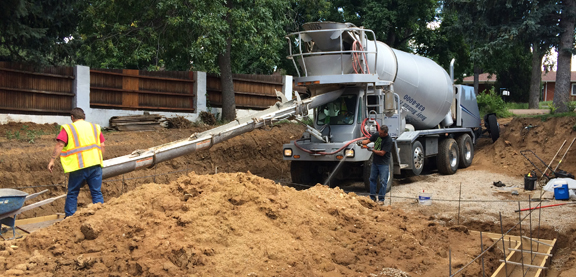
About three hours later the concrete is distributed evenly, to the top of the forms - which have been installed perfectly level. Then it's finished smooth on the top. Here are a couple of shots of the footer after the forms have been removed. 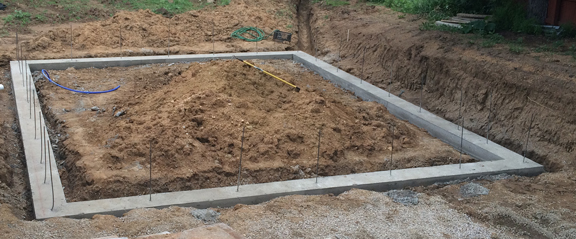
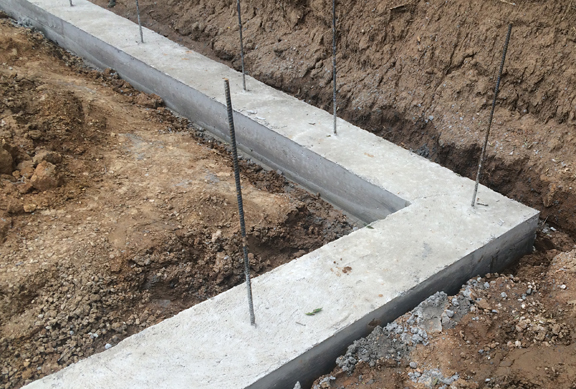
The foundation walls should be up sometime next week.
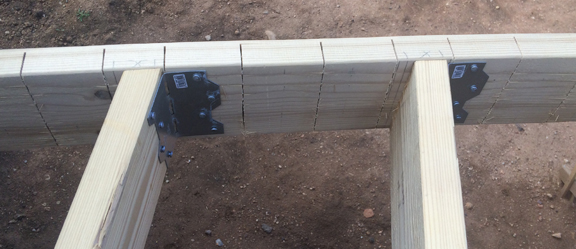
After that we'll backfill both the inside and outside to prepare for the garage floor, driveway, and final grading of the rest of the yard. Finally! Building things other than pipes below ground gives us the feeling we're getting somewhere. The most important step in building a deck is the ledger board - the first board. The ledger is bolted to the house and must be absolutely level and straight. Pick the best board you can find! Every bolt hole is predrilled and each joist location is marked before the ledger is installed. Once the ledger is up, only one side of every joist hanger is nailed using a 6 inch long joist scrap as a guide. You can't see this from the street, but isn't it pretty? 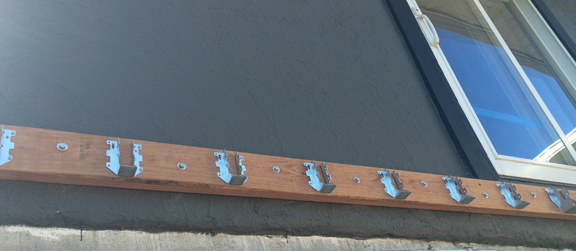
Now I need to create a temporary structure to hold everything in place and allow access. 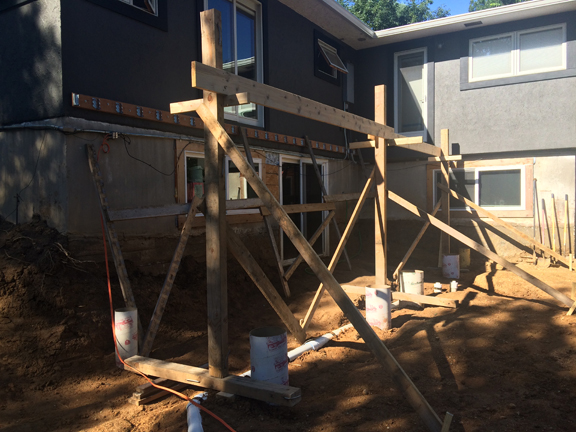
Now there's momentum! Because the joist hangers have been located and the temp frame is level, I literally connect only one end of the joist to the hanger and let the other end rest on the temp frame. The ends will be cut to length and receive the rim joist. The temp frame will come down after the beam and posts have been attached and the concrete is poured in the tubes. 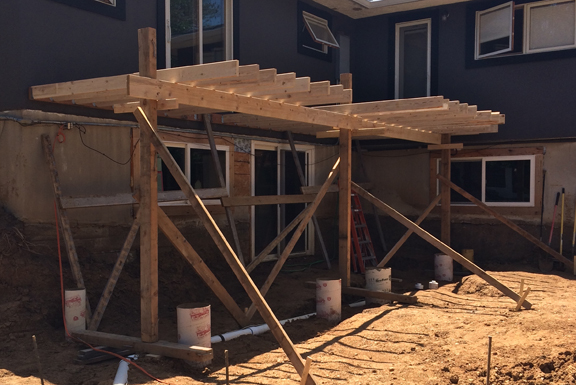
Excellent progress being made. The same day the temp frame was constructed, the forms for the footer were set. 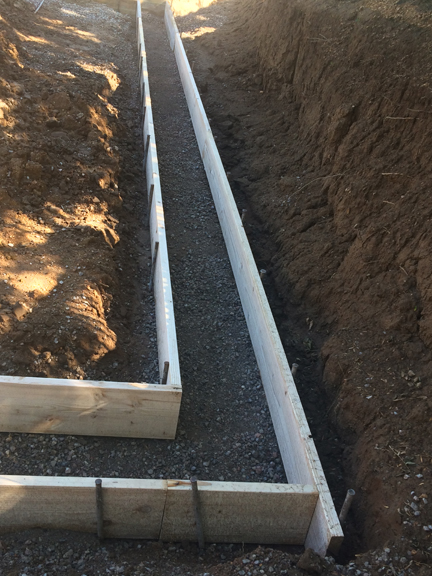
The next day, while I put up some of the joists, Chuck finished the footer by adding the rebar. Chuck is brilliant and patient. 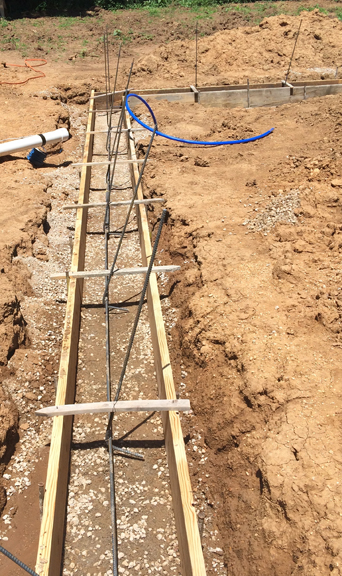
All finished last Saturday, the footer inspection was yesterday and passed without a hitch.
OF COURSE IT RAINED LAST NIGHT AND WE GOT 2 INCHES IN 20 MINUTES!! Peacefully, concrete is being delivered today. Sweet. Last Thursday, I took a day off with a different set of tools. Didn't teach golf to my son, but gave a little driving advice - not the club, the cart! 
Different day off, different smiles. The Renaissance Fair was surprisingly way cool! I should say there were genuine smiles, but this is the best photo to be had... 
Just for fun, here's how you know when you need a deck replaced. I could pull the framing apart with my hands, due to the excessive rot! 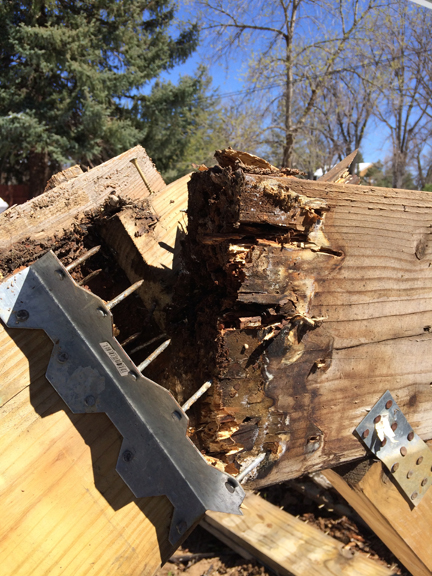
|
AuthorSix years ago this blog began when I began building a detached garage with a rooftop deck connected to our house deck. I did everything then, but now the blog will show some recent projects. Archives
August 2024
Categories |
 RSS Feed
Thomas J. Birkeness, Founder & Master Craftsman | 719.896.0574 | [email protected]