|
The roof is done. It's an EPDM rubber membrane roof, and I'm probably being redundant if you know what EPDM means. All I know is there's no more rain water flowing into the garage! From up here, the view is fantastic! 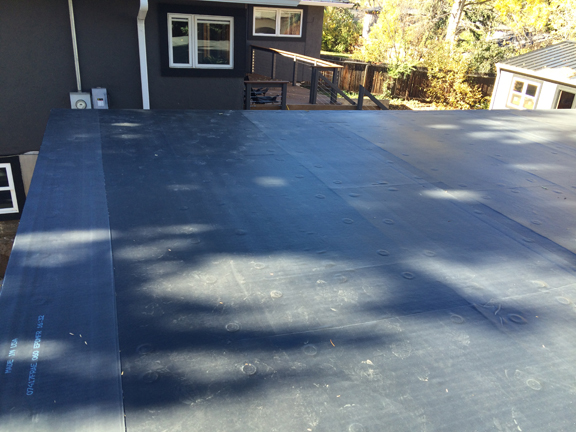 On top of the OSB (Oriented Strand Board) sheathing, I put down a layer of fiber board specifically for the EPDM layer. There are special screws and large diameter washers required for this layer. 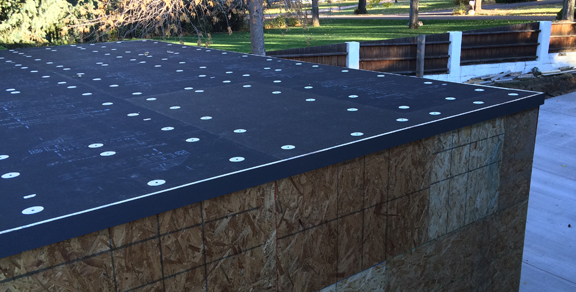 After putting on cedar trim, edge flashing, and super-duper rubber edge tape, we slopped on the adhesive for the EPDM roll. Believe me when I say it was difficult to climb the ladder with a 10ft X 25ft roll of really heavy rubber on my shoulder. It was about 150 pounds. Three times! This pic shows how you position the EPDM, fold it back halfway, apply the glue, then fold it back into position, and then smooth it with a push broom and work out any air bubbles. All in all, a very productive afternoon. 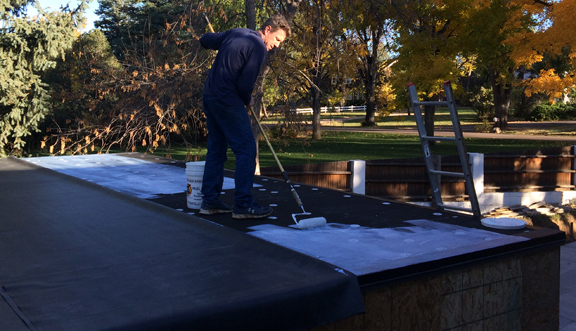 Here's a little fun fact. Pipes cannot be set into position by concrete. After failing the 'Plumbing - Base' inspection, I had to demo the concrete around the pipes in the floor, and the foundation wall, then wrap the floor pipes with layers of foam and set the foundation wall pipe inside a sleeve, requiring the waste line to be removed and replaced. Of course I have since poured new concrete in those holes and the inspector has come back and I have passed his inspection. 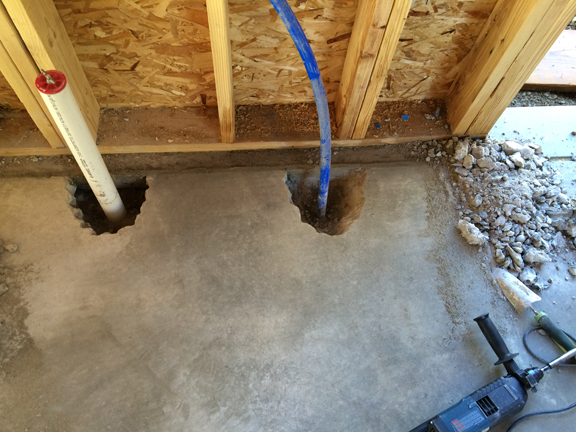 Since then, I have also passed the 'Electrical - Rough' and 'Framing' inspections.
The next visible change will be garage doors and stucco, which we're in the process of figuring out. In the meantime, I'm doing stuff like more wiring and installing insulation. Yes, insulation means we are heating the garage. It's our choice to address the freeze protection required for plumbing. And, if you have water, you must have both hot and cold water. So we got a point of use, tankless, water heater. It's only 1.5gpm, but you can use it for as long as you need. Not as expensive as you might think - that was the space heater. HA!
2 Comments
Last week the driveway concrete was poured. We chose to increase the depth from four to five inches and reinforce with rebar to avoid cracking (good luck there) and support heavier vehicle traffic. Here's a pic of the guys just before the last load was poured. The driveway used up 35 yards of concrete poured on two successive days. 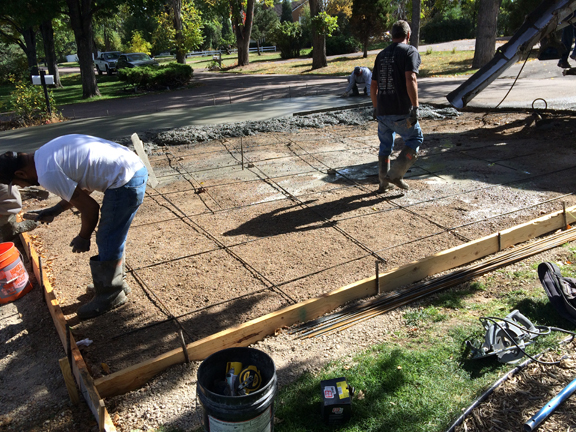 This is a beautiful site - for our neighbors who've been seeing our cars parked on the street for a long time. 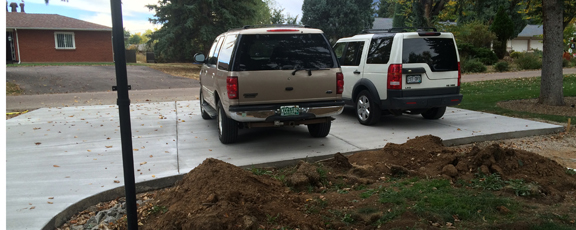 In the meantime, I finished framing the walls. The next thing on the hit list was to tackle this pile of TJI joists. 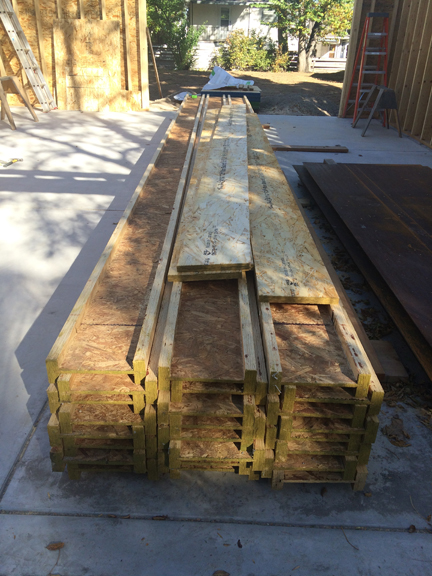 I had to cut each end square and to the correct length. I made SURE I measured twice and cut once. Otherwise, I'd be saying, "I've cut it twice, and it's still too short!" It was a beautiful day as you can see.I may have forgotten to mention that I put up a couple of rows of OSB on the walls to stiffen them up. Otherwise the whole structure would be rather flexible. I installed these by myself. Here, the first three are up. But, of 24 total, each one felt like it weighed more than the one before. Did I mention I've lost 10 pounds at the "Birkeness Backyard CrossFit Center?" 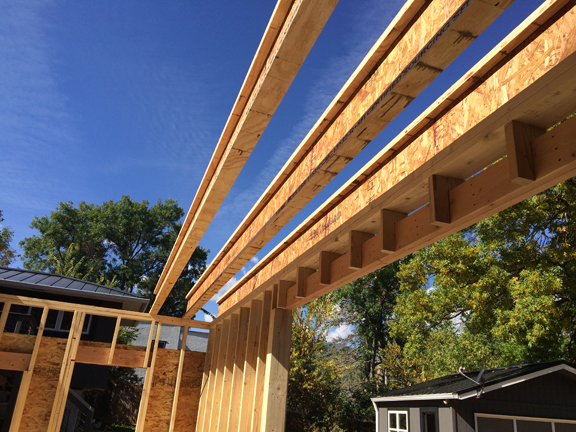 The next day I put the sheathing on the roof. Nailing was relatively easy. The hard part was tossing the sheets of 1/2" OSB up on the roof, all 26 of them. Even though it looks really good, we still have a long way to go. Next up is base plumbing, rough electrical, rough mechanical, and framing inspections. Of course I have to do the work before the inspections happen. Then insulation, roofing, and doors. All this in no particular order, just get it done as soon as I can. 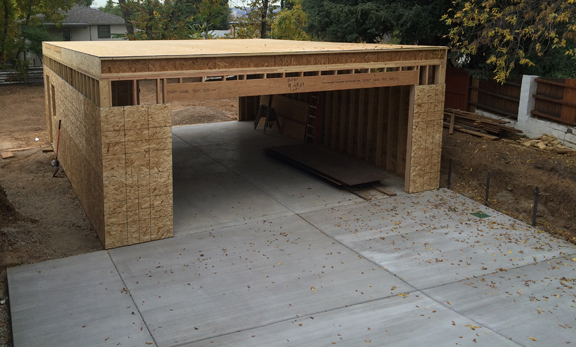 This project has three parts; the replacement deck attached to the back of the house (1), the garage (2), and the deck on the roof of the garage (3). Part one is complete! The addition of the stainless steel wire balusters and the hand rail finishes off the details. The wire looks really great, in the shade or the sun, and you can see through it as if it were glass - without having to clean it. 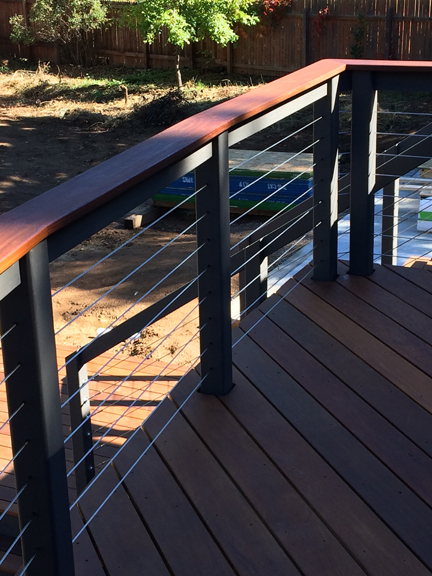
The railing curves, of course, to match the profile of the deck's shape. 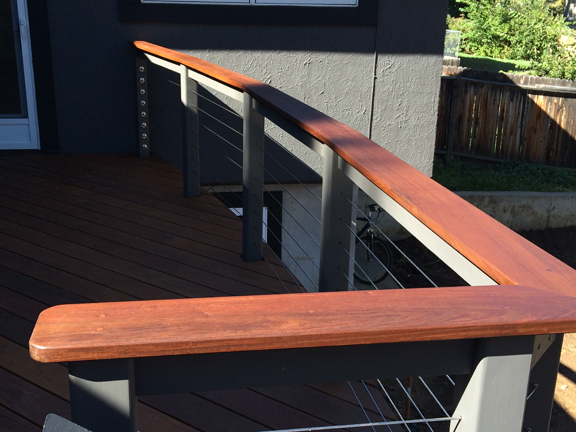
Without any delay, the lumber was delivered. I had it dropped in the dirt because I did not want to harm the fresh garage floor concrete. I did put down some plywood to keep mud off everything. 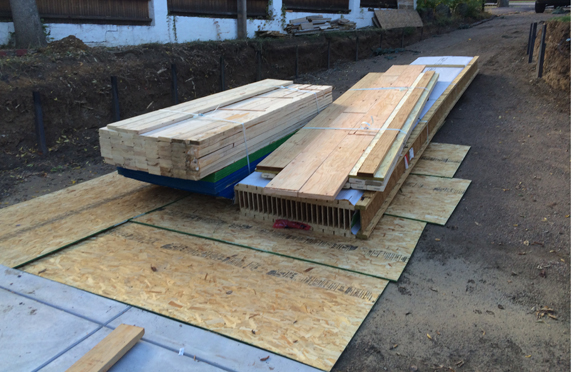
One half day later, all was moved to a workable location. 
Working around the stacks, 3 out of 4 sides have been framed. Nice. 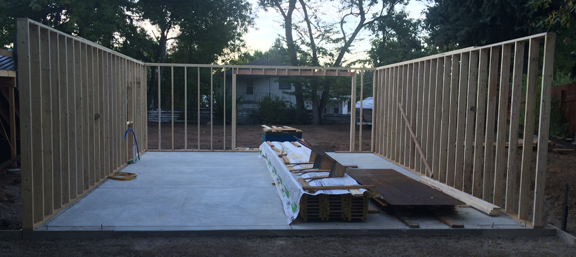
Well before I get into the rental story, I'd like to show you how nicely the boat fits in the back yard. As planned, I'll not have to back the trailer in, but can just drive through both (future) garage doors and do all the turning around behind the garage. I waited until this week for the concrete floor to cure hard enough to get a Bobcat across in order to grade the back yard flat and clean it up a bit. Then, 15 minutes after that was done, I pulled the boat out of our neighbor's driveway and put it away for the winter. Terry liked having the boat in her driveway as her friends would ask when she got the new boat, and when they would be going out to the reservoir. She totally played along. When she asked what she should tell her friends now, with the boat being gone, I suggested she make up a story that goes like this; "Just when we stopped, put out the anchor, opened a bottle of champagne, and set out hors d'oeuvre, the boat sank!" We're working on details to make it believable. Only you know the truth! 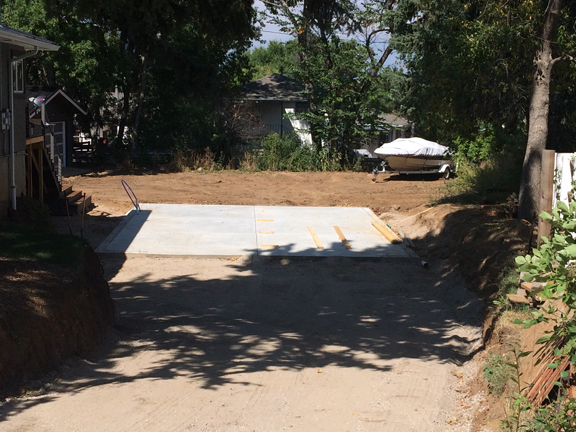 The steel arrived the same day. This will be the retaining wall for each side of the driveway. Six sheets 4ft X 12ft and seven 3" X 3" angle, all 3/16" thick, aka HEAVY! This is actually CorTen steel, a particular steel used for architectural applications. CorTen stands for CORrosion resistant TENsile steel. We chose this because of it's look and because it uses less space compared to the retaining wall building blocks sold at home improvement stores. 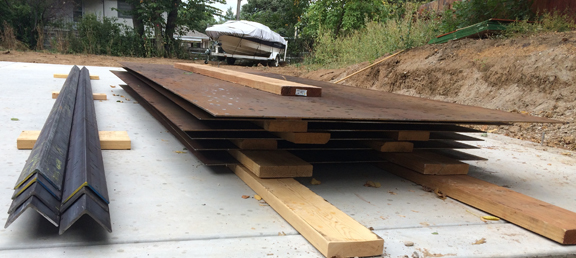 I knew they made a pneumatic tool to drive the posts into the ground and I wanted to rent one. So I called the rental place to verify that my shop compressor had enough power to run the tool. The answer was "No." But they would gladly rent the compressor, of course. I told the rental guy I wasn't sure if I had enough room in the Expedition to carry the compressor. He said don't worry it comes on it's own trailer!?! Seriously. It's 180 CFM (cubic feet per minute) my compressor is only 9 CFM.  So, properly equipped, I prepped each post cutting as necessary with a SawsAll, and began putting all 25 posts in the ground. Each post is on 49" centers to accommodate the 48 1/2" sheet width. 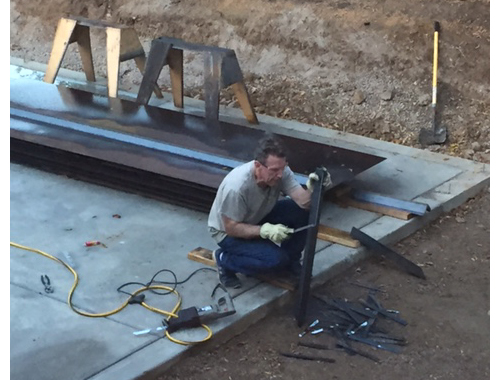 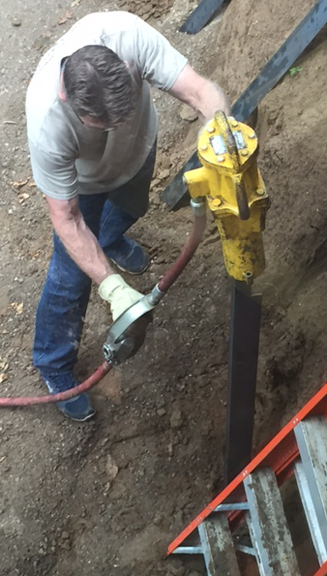 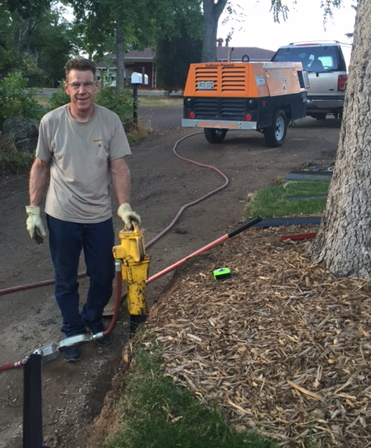 That little yellow post hammer weighs about 80 pounds. It kicked my butt - that's why I'm blogging today. I had to use a ladder to carry it up high enough for the 6ft tall posts. Today, about the only thing I can lift is the mouse for my computer. It was very efficient, however. Returned everything the next day for only a one day rental. The posts will define the boundary for the concrete driveway. Then the concrete will define how low the sheet metal should be to the ground. Then I'll cut the sheet metal and fasten to the posts with self tapping stainless steel screws - with matching brown heads to go with the rusty look of the steel. Cheers! 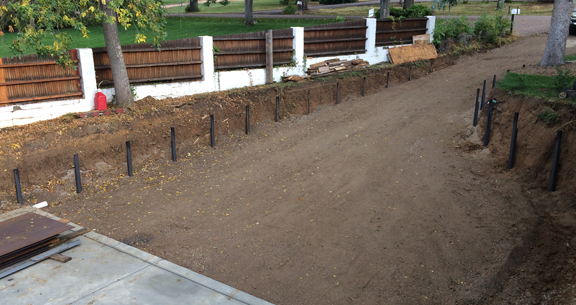 I finally have some 'after' pictures to show. The deck boards have all been installed, fastened, and trimmed. To prepare for the Ipe Oil, I'm halfway through sanding, but you get the point. Besides the oil finish, what remains for this little deck is the wire balusters and the Ipe hand rail. 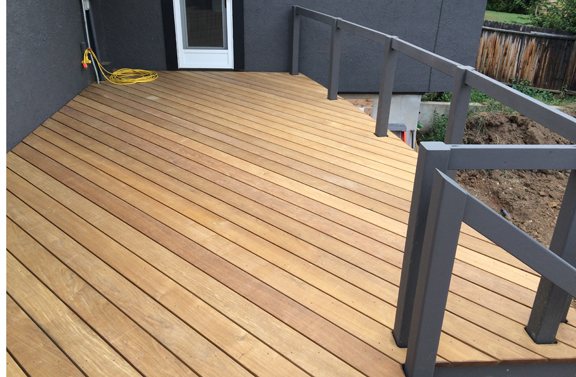
The landing is really large in the photo, but rather nice in reality. With only three steps no hand rail is required. 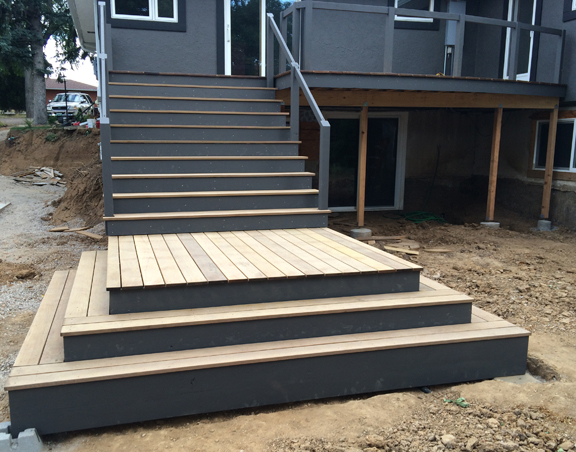
Here you can see that I have also put up the fascia everywhere except for the future stairs to the garage rooftop deck (on the left.) The Ipe should darken up very nicely after applying the oil, as if it were raining - it's a matter of time.... 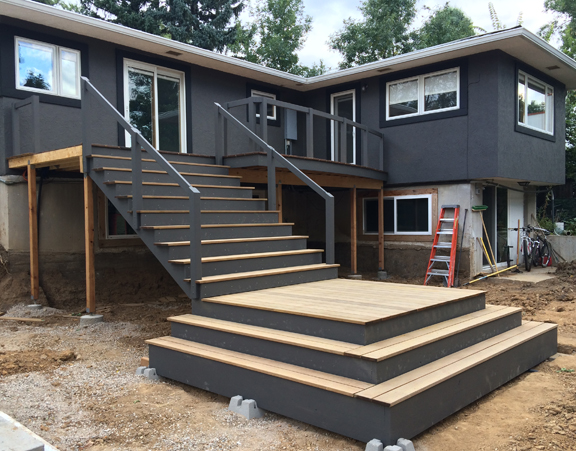
Well, out of the corner of my eyes I'm watching the concrete dry. But I've been busy! Really, I have! Tomorrow will be 2 weeks since the floor was poured. That's plenty of time. Actually, Chuck said one week was enough time for light weight vehicles, but who has one of those? So, in the meantime I dug what I hope to be is the last ditch - ever. This was for power to the house and shop. What I'm not showing is the other ditch to the shop from the garage for our Dish Network wiring and other wiring in case we attach outdoor lighting to the shop from the house. 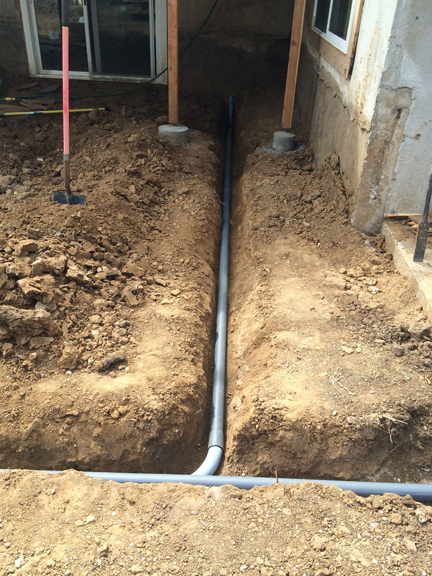
The stairs up to the deck come down to the landing. So I built the framing for that, being very careful to make sure it was in the right spot and at the right height and parallel to the deck beam. Being less than 18 inches from the ground, it was made of pressure treated lumber. I almost forgot to say I had to dig for the foundation blocks, too. Here's that monster: 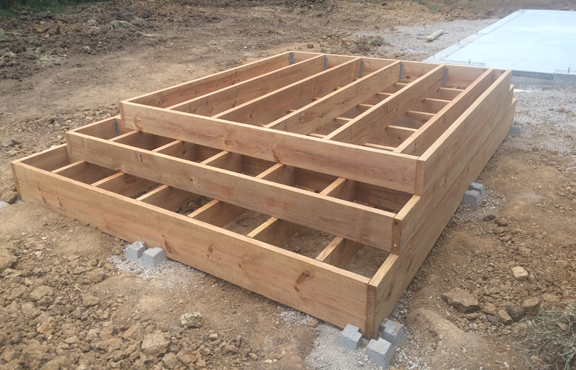
After the landing was squared away, and checked for accuracy. The next step was to make the frame for the stairs. I don't know why, but the stair frame members are called stringers. the trick is to make the first one correctly, then use it as a template to cut the rest. 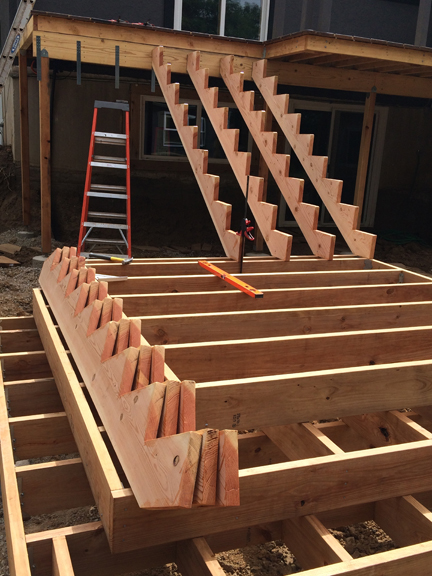
When you make your stringers, you'll need a framing square (which I think think all guys own, right?) Then, instead of buying fancy little square stops that will just get lost, I find a reasonably straight piece of scrap and clamp it into position to draw the rise and run of each step. 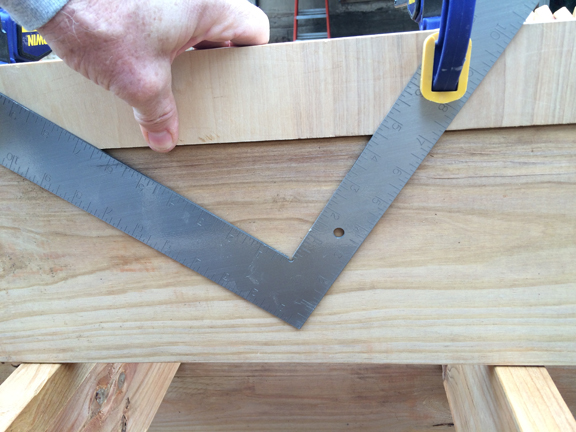
Then cut out the pattern for the steps staying to one side of the line. Use that stringer as the template for the remaining stringers and cut to the same side of the line. If you're not particular about which side of the line you're cutting, or how sharp your pencil is, please don't ask me to fix it - we all learn from our mistakes and you'll learn, too. The reason I'm making a big deal about this is because the width of the saw blade can be up to 1/8 inch, and when you cut to either side or nearby the line (please don't tell me that!) it can be up to 1/4 inch off. This requires accuracy! If it takes an extra hour to make sure you have figured out the rise and run correctly, it will be an hour well spent. Or your stairs won't be flat or solid. 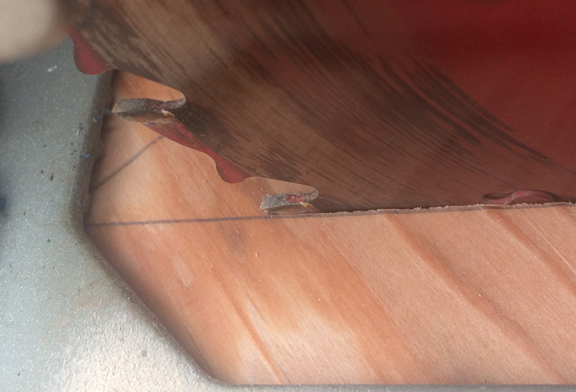
Here's the completed framing. Notice the blocking I added to the outside stringers to beef up the railing post attachment locations. This photo is a few days old. I've been painting and decking like mad to get rid of that ladder behind the stairs. I hope you look forward to the finished photo! 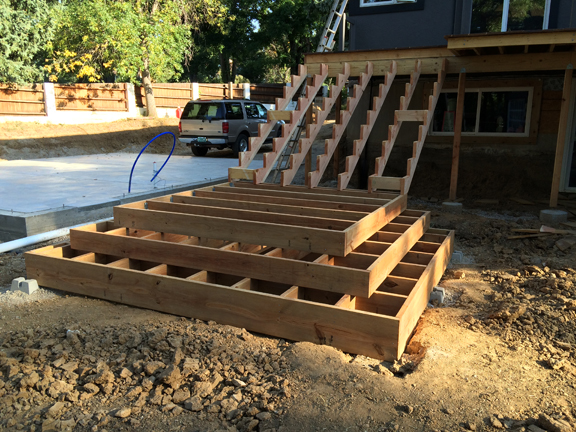
So I had a little fun with the dust mask my son, Dane, was wearing when he sanded the railing posts. What do you think? 
First things first. The gaping hole in the foundation was backfilled with road base, leveled, and tamped down. 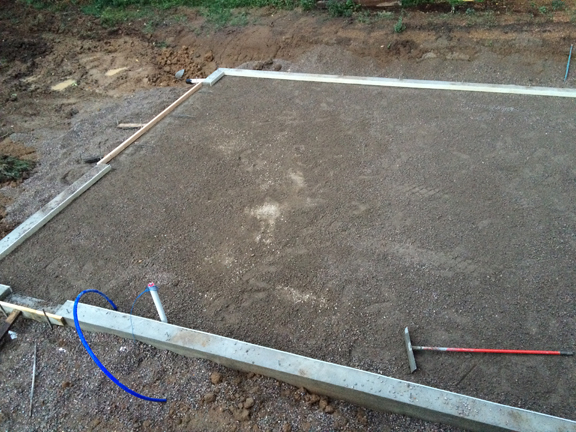
This time a little rain is helpful - if it's a 'little' rain and 'after' the tamping is finished. The tamper is the yellow contraption in the back corner, and is called a Jumping Jack. 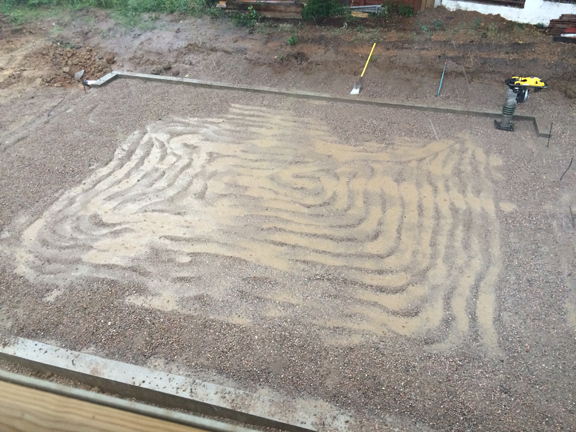
I spy with my little eye, something excellent! 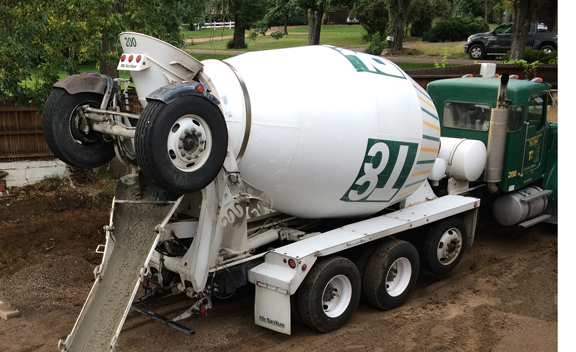
It's like he said, "Concrete will make a man out of you... It might not be the man you want to be, though" Then he laughed. 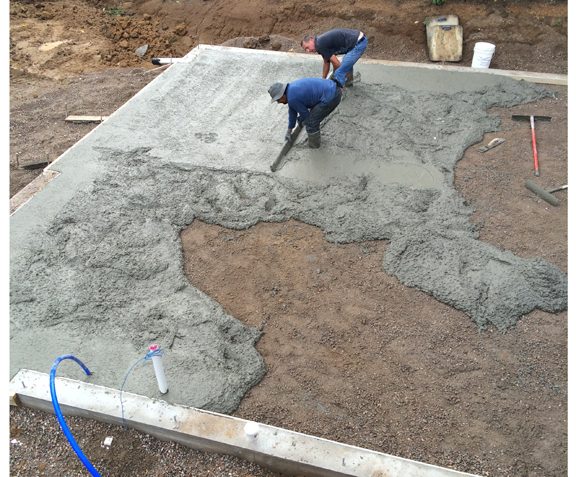
Concrete takes a day or two to dry enough to walk on, but at least a week before I can drive a car on it. Lots of small steps in this project, and I get excited to see them come to fruition! 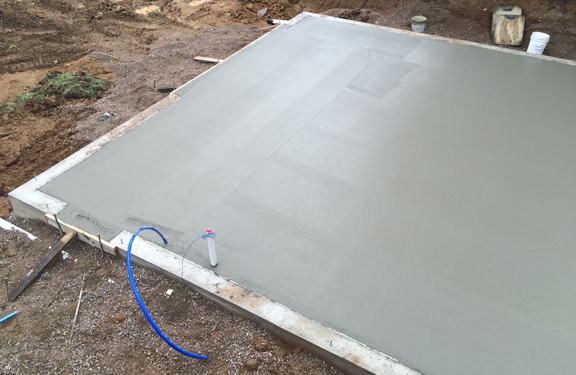
I'm finally able to use the Ipe wood for the deck. It has acclimated, and have now learned that I have a sensitivity to Ipe dust - like a very, very, very bad sore throat from the flu. Realizing that, it's dust mask time. I had heard of exotic woods doing this, but I had never experienced it. It's nasty. Of course it rained before I could attach the first board. 
I was able to finally get moving a little faster. They make a handy tool for bending boards together so they look straight and show an even gap. I made the gap 1/4 of an inch with some little spacers I made from some scrap 1/4" plywood and leftover dowels. You can see them below sitting on the plywood. They just hang between the boards and you can push or pull as you please. 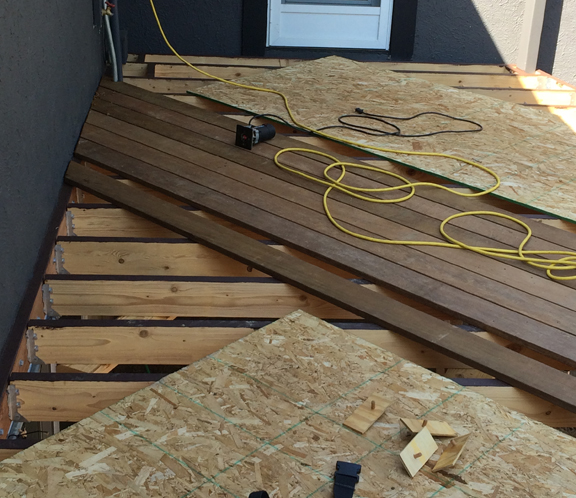
In order to look professional, I only put a few fasteners down to assemble the deck boards more efficiently. After all the boards are down, I'll snap a chalk line and drive the remaining screws so they line up. Use blue chalk NOT red - red doesn't go away. 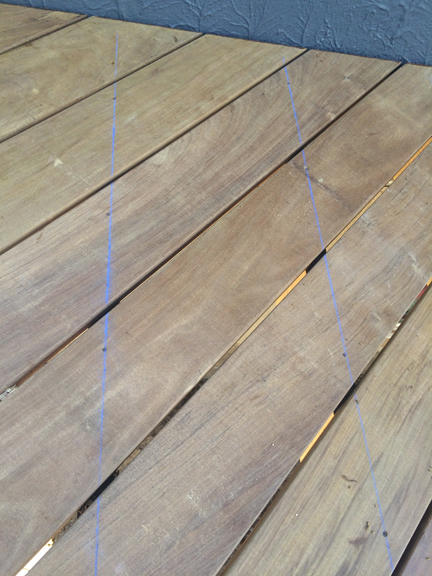
A mandatory decking tip is to stand and put your weight on each board while driving the screws. It will help keep the boards flush to the joists. Once all the boards have been screwed into place, the whole deck is now rigid enough to remove the temporary support structure. Notice I leave the boards long at installation. I will trim all at once to keep an even cut line. 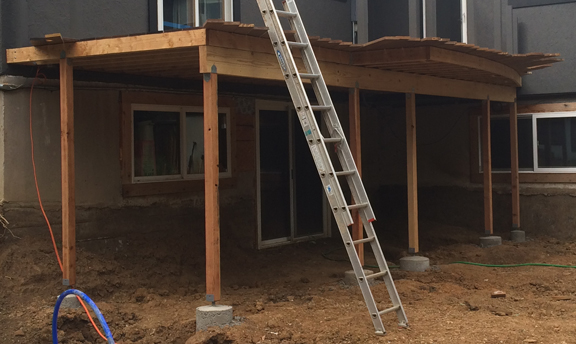
While all that was going on, the foundation wall was formed and poured! Nice. 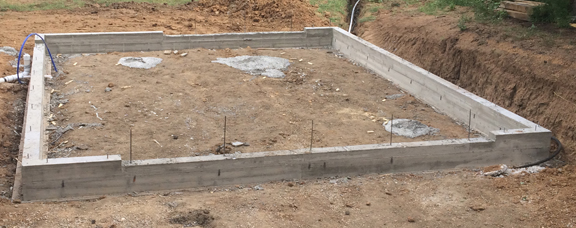
The decking has arrived! With the construction, it's quite a haul from the top of the driveway to around back - and this stuff is heavy (cement all over again!) These 6 inch wide boards range from 9 to 17 feet in length. We chose "ipe" for the deck. It's real wood. Not cheap, but better than the best artificial decking, I think, both in price and durability. The only drawback is it will need a fresh coat of Ipe Oil every couple of years, but just wait until you see it finished. Should be worth the effort. It is all stacked and stickered for the next 7 days to acclimate. Then it's time for installation with stainless steel screws. 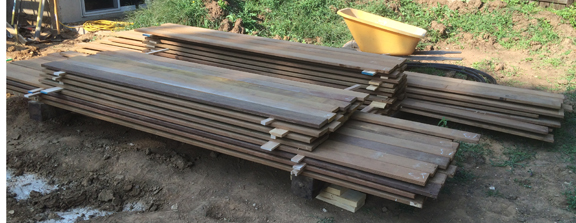
I don't mind the rain, or the rain, or the rain. What I really hate is an 80 pound bag of cement. No matter how good the job turns out, my back hates it. It was just under 20 bags, yes that's not even 1,600 total pounds. This ranks even lower than shoveling wet clay, on the "I can't wait for this job to be over," meter. Just add water, mix, and cement turns into concrete! 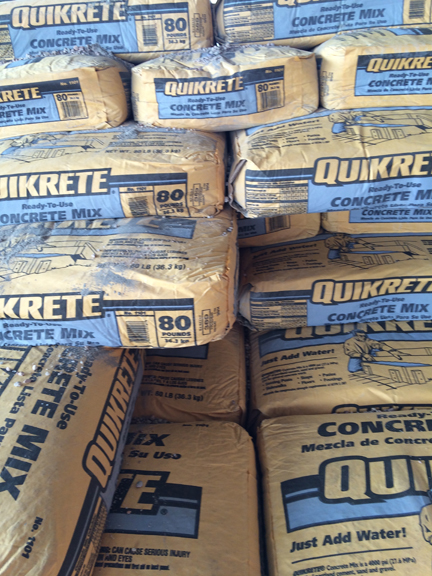
Here's what the concrete looks like in its finished form. A hole dug into the ground 30 inches deep with a 6 inch tall collar, sculpted to look fresh as a daisy. The form will come off and reveal pretty concrete 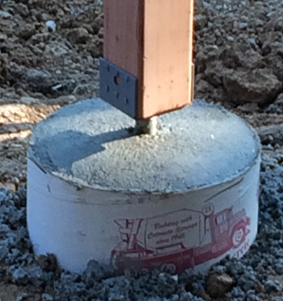
I'd rather shovel this pile of crushed concrete (how appropriate.) This pile was 15 tons and is actually easy to work with. 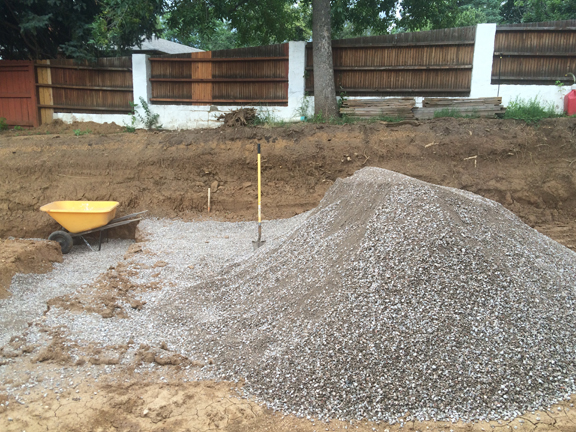
The foundation walls are being constructed right now. Once inspected, the walls are poured. After the walls, backfill on both sides, then the garage floor!
I can't wait... |
AuthorSix years ago this blog began when I began building a detached garage with a rooftop deck connected to our house deck. I did everything then, but now the blog will show some recent projects. Archives
August 2024
Categories |
 RSS Feed
Thomas J. Birkeness, Founder & Master Craftsman | 719.896.0574 | [email protected]